A one year warranty inspection can prevent a $25,000 surprise from becoming your problem. Builders often schedule a warranty review near the end of the first year, when finishes have settled, systems have cycled through a full summer and winter, and small defects have had time to reveal themselves. That timing is useful, but only if somebody looks beyond loose cabinet hardware and paint touch-ups.
I approach a one year warranty inspection as a cost audit, not a courtesy walkthrough. The question is not whether the house feels new. The question is how many dollars you would spend to correct what the builder missed, minimized, or categorized as normal. A $1.2 million house deserves more than a checklist and a polite handshake.
Why the One-Year Mark Matters
New construction defects do not follow the calendar. Some appear immediately, such as missing flashing, cracked grout, or an HVAC system that never reaches the upstairs bedroom. Others need months of moisture, temperature changes, and daily use before they become visible. A one year warranty inspection catches both categories while the builder's warranty process is still active.
The first year also provides useful evidence. Doors that stick only after heavy rain, a garage slab that develops a widening crack, or a shower that loses hot water after five minutes can be dismissed during a rushed pre-closing inspection. Repeated symptoms over time are harder to wave away. Keep dated photographs, service tickets, utility bills, and notes about when each condition appears.
A builder may describe a 3/8-inch floor variation as normal settling. That phrase is not a repair budget. Depending on the location, correction can involve leveling, flooring removal, trim replacement, or tile demolition. The invoice can move from $800 for localized adjustment to more than $15,000 when several finished rooms are involved.

What the Inspection Should Cover
A serious one year warranty inspection starts outside. I look at roof penetrations, kick-out flashing, siding transitions, window head flashing, deck connections, grading, retaining walls, and drainage outlets. Water moving toward a foundation is not a cosmetic issue. Correcting a localized drainage problem may cost $2,000 to $6,000; repairing saturated framing or interior finishes can cost several times that amount.
Inside, the inspection should test every major system rather than admire the finishes. That includes HVAC temperature split, condensate drainage, electrical panel labeling, GFCI and AFCI protection, plumbing pressure, water-heater operation, exhaust ventilation, attic insulation, crawlspace or basement moisture, and visible structural framing. Luxury homes frequently hide equipment behind finished access panels, so those panels need to be opened.
I also test the details people use every day. Do bedroom doors latch without lifting? Does the range hood actually exhaust outdoors? Does the shower maintain temperature when a toilet flushes? Do motorized shades, smart thermostats, garage doors, irrigation controls, and backup pumps operate as represented? A failed smart-home component might cost $300 to replace, while an improperly installed drain line behind a wall can become a $10,000 demolition job.
The Defects That Deserve a Dollar Figure
Every finding should have an estimated correction cost and a consequence if ignored. A cracked caulk joint around one window might be a $150 maintenance item. Missing window flashing that has already stained interior drywall belongs in a different category, with a preliminary reserve of $3,000 to $8,000 depending on access and damage.
Tile is another common trap. A hollow-sounding tile is not automatically a failure, but widespread debonding, cracked grout, or lippage across a wet area can signal poor substrate preparation. Replacing a few tiles may cost $500 to $1,200. Rebuilding a shower pan, waterproofing membrane, and tile assembly can reach $8,000 to $20,000. The visible crack is often the cheapest part of the story.
Cabinet alignment, paint, and drywall still matter, especially in a high-end home, but they should not crowd out expensive risks. A one year warranty inspection should rank findings by cost, safety, water exposure, and difficulty of future access. A crooked drawer is irritating. An unsealed roof penetration is a liability attached to every rainy season.
How to Document the Warranty Claim
Start with a room-by-room schedule. Give each item a location, description, photograph number, date observed, likely cause, and estimated correction range. Do not write “wall looks bad.” Write “vertical drywall crack at the stair landing, approximately 4 feet long, reopened after prior patching; investigate movement before repainting.” Precision keeps the conversation from drifting toward cosmetic touch-up.
Group related symptoms. Several doors that bind on the same wall may point to framing movement or moisture, not four unrelated hardware adjustments. Multiple warm rooms may indicate duct design or balancing problems rather than four thermostat complaints. Builders respond more seriously to a pattern supported by measurements than to a stack of vague complaints.
Send the report early enough for the builder to investigate and schedule trades. Photograph shutoff valves, equipment model plates, cracks with a ruler for scale, and any area that will be concealed after repair. Save the original files. A compressed text message image is not a strong record when the dispute concerns whether a crack grew from 1/16 inch to 1/8 inch.
What Builders Often Call “Normal”
“Normal settling” is a description, not a diagnosis. Some minor drywall movement is expected in new construction, but the location, width, recurrence, and associated symptoms matter. A crack at a drywall joint is different from a stair-step crack through masonry, a diagonal crack at a window corner, or a floor slope that causes doors to swing open. Those observations determine whether the next step is simple patching or further evaluation.
“Cosmetic” can also hide a functional problem. Peeling paint near a window may indicate condensation or leakage. A discolored ceiling may be an old stain, or it may be the only visible evidence of an active roof defect. A one year warranty inspection should challenge labels with measurements: moisture readings, slope measurements, temperature readings, pressure tests, and photographs.
Do not let a repair crew close an issue without verifying the result. If a ceiling stain is painted, inspect the attic and test the area after rain. If an HVAC contractor adjusts airflow, measure the room temperatures afterward. If a plumber replaces a valve, operate every fixture connected to that line. The repair is not complete because the invoice says completed.
The Cost of Skipping the Inspection
Skipping a one year warranty inspection can look economical when the builder offers a free walkthrough. It is less economical when a missed defect emerges after coverage expires. A failed sealant joint might become interior water damage. An unbalanced HVAC system might shorten equipment life. A drainage issue might saturate soil beside the foundation for years before a settlement crack becomes obvious.
For a $1 million-plus home, spending roughly $700 to $2,000 for a detailed inspection and cost review is small compared with one concealed repair. The exact fee depends on size, location, specialty systems, and whether structural or infrared testing is included. The useful comparison is not inspection cost versus zero. It is inspection cost versus the repair reserve you avoid losing.
A Practical Final-Week Checklist
Before the one year warranty inspection, run every faucet, appliance, exhaust fan, drain, thermostat, garage door, and exterior outlet. Walk the property after rain. Look in the attic, mechanical spaces, crawlspace, garage, and behind accessible panels. Review all prior builder tickets and verify whether each item was actually corrected.
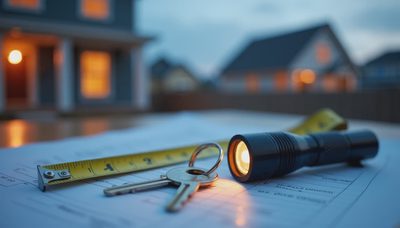
Bring a flashlight, outlet tester, level, moisture meter, thermometer, tape measure, and camera. Do not poke at energized equipment or dismantle sealed assemblies. The goal is disciplined evidence, not theatrical destruction. Leave the builder a clear schedule showing what needs testing, what needs repair, and what documentation you expect afterward.
The best one year warranty inspection produces a prioritized ledger: urgent water or safety issues first, performance failures second, costly concealed conditions third, and cosmetic corrections last. That order protects both your house and your negotiating attention. Don't ask whether there is anything wrong with the home. Ask how many dollars you have to spend to fix what was overlooked, and make the builder answer with work instead of adjectives.



No letters yet — pray write the first.