A $1,000 to $2,500 inspection can prevent a $15,000 drainage repair, a $22,000 HVAC replacement, or a six-figure structural surprise. That is the practical purpose of an 11 month warranty inspection: identify defects while the builder is still responsible for correcting covered workmanship and installation problems. “New construction” is not a synonym for finished construction. It is a delivery date.
Most builder warranties provide a limited period for workmanship and materials, often one year, although the actual terms depend on the contract and applicable law. The eleventh month gives you a narrow but useful timing window. You can document problems, request repairs, and create a paper trail before the first anniversary passes. Do not confuse this with a casual homeowner walkthrough. You need evidence, measurements, photographs, and a repair list that does not read like vague house-shopping commentary.
What an 11 Month Warranty Inspection Should Cover
A competent inspection starts outside because water is the most efficient destroyer of expensive homes. The inspector should examine grading, swales, retaining walls, patio slopes, window and door flashing, roof penetrations, gutters, downspouts, exterior sealants, brick or stucco cracks, and irrigation overspray. A quarter-inch gap at a poorly sealed trim joint is not dramatic. Repeated wetting behind it is how a $300 caulking omission becomes a $12,000 envelope repair.
Inside, the inspection should move beyond tapping walls and testing a handful of outlets. Look for doors that swing open by themselves, floors that slope, cracked tile, drywall joint movement, loose railings, leaking supply valves, slow drains, missing attic insulation, duct leakage, and evidence of condensation. In a luxury home, the list also includes motorized shades, wine refrigerators, backup generators, pool equipment, water treatment systems, smart-home controls, and expensive built-ins. A $1.2 million address can still contain a $9 compression fitting installed by someone working too quickly on a Friday afternoon.
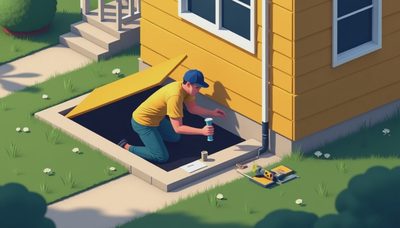
The inspection should also include the attic, crawl space, or accessible mechanical areas. Check framing changes, roof sheathing, bath fan termination, plumbing leaks, electrical junctions, insulation depth, and signs of pests or moisture. Infrared imaging can identify temperature differences, but it is not magic. It highlights areas requiring investigation; it does not diagnose every hidden problem.
The Cost Items Builders Commonly Minimize
Builder representatives often describe findings as “normal settling,” “cosmetic,” or “within tolerance.” Sometimes that is accurate. Sometimes it is a conversational smoke bomb. The useful question is not whether the crack looks attractive. It is whether movement is active, whether water can enter, and what the repair sequence costs.
Hairline drywall cracks may need simple patching and paint. Cracks that recur at door corners, stair-step through masonry, or align with slab movement deserve more attention. A structural engineer’s evaluation might cost $500 to $1,500, while remediation can range from several thousand dollars to far more if drainage, foundation movement, or framing defects are involved. Nobody wins by accepting a $200 cosmetic patch over a $20,000 water-management problem.
HVAC performance is another place where “it works” is a weak standard. Measure temperature differences, inspect condensate drainage, verify equipment access, examine duct connections, and check whether rooms receive balanced airflow. A system that cools the hallway while a west-facing bedroom runs eight degrees warmer can produce years of complaints and premature equipment wear. Corrective costs range from $300 for balancing and sealing to $8,000 or more for substantial duct or control changes.
Plumbing defects deserve a dollar column too. A dripping relief valve may be a minor replacement. A concealed leak beneath a shower, improperly supported pipe, or missing pan protection can involve demolition, drying, tile replacement, and finish matching. Budgeting $1,500 for a visible plumbing repair is very different from budgeting $18,000 for a bathroom reconstruction.
Build a Warranty List That Gets Action
The report should not be a pile of photographs with captions such as “issue noted.” Create a numbered schedule with four fields: location, observed condition, recommended correction, and estimated cost. Add a fifth field for urgency. For example: “Second-floor guest bath, shower curb leaks during controlled spray test, remove and retest waterproofing at curb, $2,500 to $6,000, urgent.” That sentence gives the warranty manager something to assign instead of something to dismiss.
Photograph each issue from two distances. The wide image proves location; the close image shows the defect. Include a tape measure, level, moisture meter reading, or thermal image when relevant. Record dates and weather conditions for exterior findings. A photograph of standing water after a storm is more useful than “yard drains poorly” written six months later.
Send the completed list through the builder’s stated warranty process, retain delivery confirmation, and keep every response. Separate genuine safety or active-water concerns from paint touch-ups, but include both. The small items matter because an incomplete punch list becomes an excuse to close the file.
Timing, Access, and the Second Inspection
Schedule the 11 month warranty inspection early enough to leave time for repairs and verification. Around month nine is sensible for many homes, particularly if the builder needs subcontractor availability. Waiting until the final week creates avoidable pressure. If repairs occur, inspect the work after completion rather than assuming a closed ticket means a correct fix.
Seasonal conditions also matter. Roof drainage is easier to evaluate during or shortly after meaningful rain. Cooling performance is more revealing in summer, while heating complaints are easier to confirm in winter. If the inspection occurs in mild weather, document what cannot be tested and arrange targeted follow-up when conditions allow.
Ask for access to locked mechanical rooms, attic hatches, electrical panels, garage ceilings, crawl spaces, and exterior gates. A five-minute access problem can hide a five-year cost problem. For expensive homes, consider separate specialists for structural, HVAC, pool, or waterproofing concerns rather than expecting one generalist to price every system accurately.
What the Inspection Can and Cannot Do
An 11 month warranty inspection is not a guarantee that every concealed defect will be discovered. It is a risk-control event conducted at a valuable deadline. It does not replace reading the warranty documents, confirming exclusions, or understanding required notice procedures. I am an engineer and cost auditor, not your attorney, so contract interpretation belongs elsewhere.
What the inspection can do is turn impressions into priorities. “The basement feels damp” becomes “moisture is present at the northeast wall, drainage correction and interior restoration could run $15,000 to $22,000.” “The house has some cracks” becomes “six recurring cracks require monitoring and two warrant engineering review.” That translation is the difference between a builder visit and a repair plan.
The right professional will also tell you when not to spend money. A stable nail pop requiring patching is not the same as a displaced retaining wall. Sarah would red-pen any spreadsheet that treated those items equally, and she would be right. Rank findings by water risk, safety, structural significance, system damage, and repair cost.
The Dollar-Based Final Checklist
Before the visit, gather your purchase closing documents, warranty booklet, prior punch lists, appliance records, and photographs from move-in. Walk the property with blue tape and mark every location that has changed. Test windows, doors, plumbing fixtures, exhaust fans, garage doors, appliances, and controls. Note unusual sounds, odors, temperature differences, recurring stains, and sticking hardware.
During the inspection, insist on measurable observations. Afterward, ask for a prioritized report and a realistic cost range, not just a defect label. Submit the list promptly, track each response, and verify repairs with photos and functional tests.
An 11 month warranty inspection is one of the rare moments when a builder’s open obligation and your evidence line up. Use it like a cost audit. Do not ask whether anything is wrong with the house. Ask how many dollars you have to spend to fix it, who currently owns that problem, and what proof will remain when the warranty clock stops.



No letters yet — pray write the first.