A $1.2 million new home can still hide $40,000 in repair exposure. That is why a new build due diligence checklist should go beyond tapping drywall, testing outlets, and downloading a 50-page inspection PDF. New construction is not automatically clean construction. It is simply construction with fewer years available for problems to reveal themselves.
I approach a new build the way I approached commercial cost reviews: identify the defect, estimate the repair, locate the responsible party, and determine whether the issue is cheap to correct today or expensive after finishes, landscaping, and occupancy get in the way. Do not ask whether anything is wrong. Ask how many dollars you must spend to make it right.
Start with the documents, not the front door
Before walking the property, collect the permit history, approved plans, structural drawings, grading plan, drainage plan, soil report, energy documents, product manuals, warranty paperwork, and every change order. The goal is not to admire the paper stack. The goal is to compare what was designed with what was built.
Look for missing inspections, open permits, substitutions, and unexplained changes in roof framing, windows, insulation, HVAC equipment, or waterproofing. A plan may specify a particular window performance rating while the installed unit carries a different label. That difference can affect air leakage, condensation, comfort, and replacement cost.
The new build due diligence checklist should also include a written list of promised features. “Designer lighting package” is not a measurable specification. Count fixtures, identify manufacturers, record model numbers, and photograph installed equipment. The same applies to appliances, plumbing trim, flooring, cabinetry hardware, and smart-home controls. A vague promise is difficult to price after closing.
Inspect the structure and envelope like a budget problem
Cracks are not automatically catastrophic, but they are not decorations either. Record location, width, direction, and whether the crack crosses masonry, drywall, tile, or a structural connection. A small drywall crack might cost $300 to repair and repaint. Repeated diagonal cracking near windows, stepped masonry cracks, or a slab movement pattern can lead to engineering review, drainage correction, framing repairs, and finish replacement totaling $8,000 to $35,000.
Check the slab or foundation for elevation changes with a laser level or professional survey equipment. A floor variation that seems invisible during a casual tour can telegraph through large-format tile, affect cabinetry, and cause doors to bind. Replacing cracked tile in a luxury kitchen is not a $400 patch. With demolition, substrate correction, replacement tile, and labor, the practical range can reach $12,000 to $28,000.
The envelope deserves equal suspicion. Inspect roof penetrations, flashing, window pans, exterior sealants, siding joints, stucco transitions, deck connections, and brick ledges. Water stains below a second-floor window are not “a little damp.” They are a possible $15,000 to $22,000 remediation after insulation, drywall, trim, and flooring are removed.

Test water, air, heat, and drainage
Run multiple fixtures at the same time. Flush toilets while a shower operates. Fill a tub, operate the dishwasher, and watch the drain cleanouts and mechanical-room floor. Weak flow can indicate undersized piping, pressure issues, or a partially restricted line. A slow drain that becomes obvious after move-in can require camera inspection and localized excavation, often costing $1,500 to $7,500 before interior finishes are restored.
Test every HVAC zone under realistic conditions. Confirm supply temperature, return-air paths, thermostat operation, filter access, condensate drainage, and equipment model numbers. A large home with poorly balanced zones can produce a $200 monthly comfort problem before it produces a $6,000 duct correction or a $12,000 equipment replacement. Ask for commissioning records rather than accepting “it is cooling fine” as a technical answer.
Walk the site after irrigation operates or after a controlled hose test around vulnerable areas. Water should move away from the foundation, not collect beside it. Low spots, missing downspout extensions, soil against siding, and ponding near retaining walls are budget items. Regrading may cost $3,000 to $12,000. Rebuilding a failed retaining wall with drainage can exceed $25,000.
Build a real electrical and life-safety record
Test receptacles, switches, GFCI protection, smoke alarms, carbon monoxide alarms, garage outlets, exterior lighting, and dedicated circuits for ranges, dryers, spas, and electric vehicles. Verify that the electrical panel directory matches reality. A mislabeled panel is inconvenient; an overloaded or improperly configured circuit is a correction item that deserves prompt attention.
Inspect the panel for neat conductor routing, proper labeling, unused openings, and evidence of heat. Confirm that surge protection, generator interlock equipment, and low-voltage systems are installed as promised. Luxury homes often contain more electronics than the original electrical scope anticipated. Adding circuits later can mean opening finished walls or crossing a finished attic at a cost of $1,000 to $5,000 per meaningful correction.
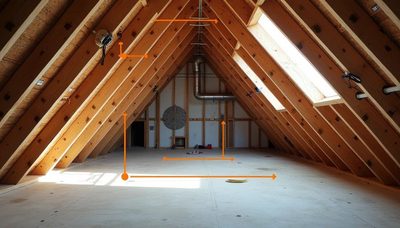
Life-safety devices should be documented by location and test result. Include handrails, guard spacing, stair lighting, tempered glass, garage fire separation, attic access, and combustion-air provisions. These are not cosmetic punch-list details. A missing handrail is cheap to install; a compromised garage separation can involve drywall, doors, framing, and inspection rework.

Price the punch list instead of admiring it
A builder punch list is usually organized by observation, not by financial consequence. Your new build due diligence checklist should assign each item a rough repair range and a priority. A scuffed door may be a $250 correction. A missing shower waterproofing record can represent a $6,000 to $18,000 risk because the finished tile may need removal to verify the assembly.
Separate defects into three groups: immediate safety or water-control items, concealed-work verification, and cosmetic completion. This prevents a crooked cabinet door from receiving the same attention as a roof flashing failure. Photograph each issue with a wide shot, a close-up, and a reference object such as a ruler. Label the room, elevation, and date.
Then calculate access costs. A repair behind a removable panel is not priced like a repair behind marble, built-in cabinetry, or imported tile. Add demolition, disposal, temporary protection, drying, permits, testing, finish matching, and general-condition time. A $2,000 plumbing repair can become $9,000 when a finished ceiling and custom millwork are involved.
Verify warranty value before closing
A warranty is useful only when the defect is documented, assigned, and tracked. Record the notification deadline, response process, emergency contact, exclusions, and any manufacturer warranties for roofing, windows, appliances, HVAC equipment, waterproofing, and solar components. Keep photographs and written descriptions in a shared folder rather than relying on verbal promises during a walk-through.
The new build due diligence checklist should include a final review after repairs, not just an initial inspection. Recheck patched drywall for moisture, operate replaced windows, test corrected outlets, inspect repaired grading after rain, and confirm that removed finishes were properly restored. Ask for invoices, permits, test reports, and equipment start-up records where applicable.
If the builder proposes an allowance instead of performing work, price the entire scope yourself. A $3,000 credit sounds generous until demolition, matching materials, and project management turn the correction into a $14,000 job. Sarah would circle that gap in red before I finished my coffee, and she would be right.
The final decision is a number
A serious new build due diligence checklist ends with a repair reserve, not a vague feeling. Add immediate repairs, probable concealed-work exposure, access costs, and a contingency for discovery. For a clean new build, that reserve might be several thousand dollars. For a home with drainage, envelope, foundation, or mechanical concerns, $25,000 to $60,000 is not an absurd planning figure.
Do not let fresh paint, unopened appliance boxes, or a builder’s confident tone replace evidence. New construction can be excellent, but excellence is demonstrated through records, testing, tolerances, and completed corrections. Walk the home with a qualified inspector, bring specialists when the structure or systems justify it, and convert every concern into a scope and dollar range. That is how you protect a seven-figure purchase before the keys change hands.




No letters yet — pray write the first.